Here is a quick video to show you how easy it is to add a logo at the top of the results printout. Note that many logos can be added, either at the top or at the bottom or both. A customized header can also replace the existing one.
En 2016, nous chronométreurs n'envisageons plus de travailler en saisie manuelle. Il faut donc connecter Wiclax à notre système RFID préféré. Notez que Wiclax s'interface largement avec de nombreux systèmes et que la liste n'est pas définitive.
Voilà une vidéo très courte pour montrer qu'il est très simple de s'interfacer directement avec un système (ici avec RFIDTiming). Il s'agit juste d'une introduction parce que bien sûr les configurations peuvent être beaucoup plus complexes : plusieurs matériels en local ou distant, plusieurs passage sur la même ligne, plusieurs boucles pour un seul décodeur, etc...
After years of good an loyal service, Clascycle doesn't really retire but instead leaves the place for a brand new name: Wiclax. More than ever in touch with your needs, keeps going for improvements and innovation.
La version 8 de Wiclax permet maintenant de gérer les engagés en réseau depuis un ou plusieurs postes distincts du poste principal.
Cette configuration peut permettre par exemple de dédier un poste à la saisie de nouveaux engagés tout en consacrant le poste principal à la gestion du chronométrage des épreuves déjà en cours.
Comment le mettre en oeuvre ?
Il n'y a pratiquement rien à faire : le service est ouvert par défaut au lancement de Wiclax et dès qu'un événement est actif, les données des engagés peuvent être éditées sur un autre poste.
Trouvez simplement le bouton Réseau dans l'onglet Engagements et visualisez l'adresse du serveur dans le menu déroulant. Saisissez cette adresse dans la barre d'adresse d'un navigateur sur une tablette ou un autre PC de votre réseau local et c'est parti !
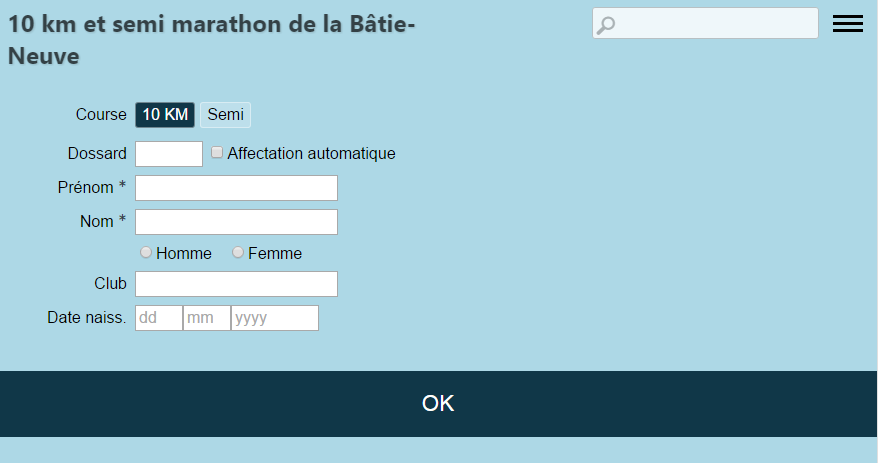
Vous obtenez ce type d'écran avec un formulaire d'édition des engagés sous une forme minimaliste.
Qu'est-il possible de faire avec ce service ? Les fonctionnalités sont les suivantes :
Rechercher un participant déjà enregistré en saisissant soit son numéro de dossard, soit une partie de son nom.
Modifier les données d'un concurrent déjà enregistré.
Inscrire un nouveau coureur en renseignant son numéro de dossard (une alerte vous avertira si le dossard est déjà attribué).
Inscrire un nouveau coureur en laissant Wiclax lui attribuer un numéro de dossard disponible. Le numéro sera déterminé selon la plage de dossard si il y en a une d'affectée à la course et sera affiché après validation.
Afficher l'historique des modifications réalisées sur le poste, pour un retour en arrière facilité si nécessaire.
Du coté du Wiclax, une marque verte apparaît sur la ligne des coureurs qui ont été ajoutés depuis un autre poste. Cette marue disparaît à l'enregistrement du fichier qui suit. Notez que seul l'enregistrement du fichier depuis Wiclax rend les modifications réalisées depuis un autre poste enregistrées de manière définitive.
Note : par souci de simplification, un seul service est actif à un instant donné sur vote PC. Au cas où vous auriez à travaillé sur plusieurs instance de Wiclax, rappelez-vous que c'est la dernière instance qui a été lancée seule qui détient le sercice. Si vous avez un doute ou que vous souhaitez basculer sur un autre événement : controllez le menu Réseau : il vous proposera de dérouter l'événement actif si ce n'est pas celui qui est en cours.
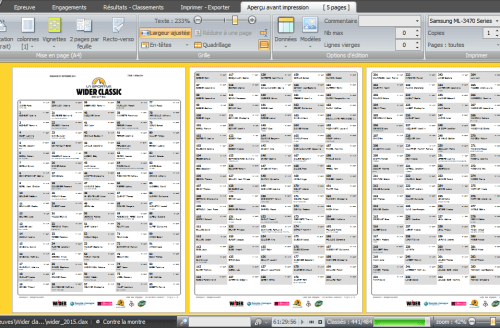
Introduced not long ago, you've probably seen this new feature in the print preview:
Still under "experiment" to see if runners take it easy - or not - when looking at their results on the paperboard and thus if some further tuning may be interesting, this new way of printing was born with multiple purposes in mind:
Modernize the old boring table display - and give you another distinctive mark that everyone can see.
Get more runners on a single page, especially when the number of information pieces is not wide. Makes it possible to have some 100 items on the first page with the default header. And the result is more visually appealing than the multi-column mode. You can save paper in situations when for example you have to distribute a participant list with a few basic information.
Introduce opportunities for design variations - align, font-size and weight, multi-line data,...
Result
Hoping you'll enjoy it! and why not make it your default printing way for the future.
On the roadmap
The feature is already available with a panel of pre-defined thumbnail templates. Choosing the number of columns and the flow direction (top to bottom or left to right) is also OK.
Next step will be finding out a possible design for triathlons, including the segment rankings. And open a thumbnail designer so that you can customize your own templates. Will be interesting to make it work with custom data of your own.
Gives you more ideas for new displays? Don't hesitate to share them.